At the client level, use the following guidelines to add a new invoice.

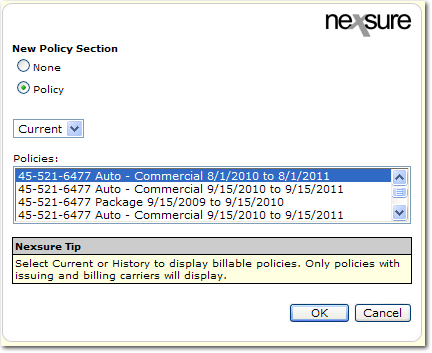
- If changes to the Invoice Bill To information are required, click [Change Bill To]. The What do you want to bill? dialog box is displayed.
Note: The Invoice Bill To can only be changed when the AR Entity is a Client.
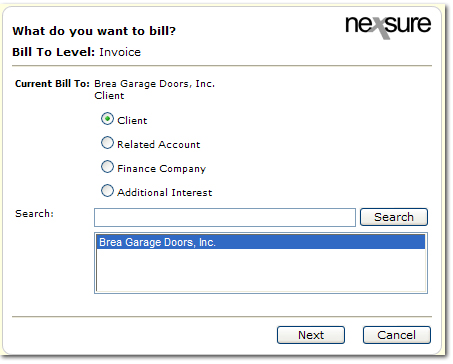
- Select the entity type to bill:
- Client
- Related Account
- Finance Company
- Additional Interest
- Third Party: Retail Agent
- In the Search box, enter all or part of the name of the entity and click Search.
- Once the entity has been found, select the entity and click Next. The Bill To: Select Location dialog box is displayed.
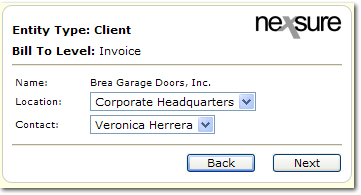
- In the Location list, select the location for the entity.
- In the Contact list, select the contact associated with the location.
- Click Next. The confirmation dialog box is displayed. Verify all information is now correct and click Ok. The bill to information is updated on the invoice tab.
- In the Premiums area, use the following guidelines:

- If changes to the Premiums section are required, click the Details
 icon next to the premium to change. If a new premium is necessary, click [Add New Premium]. The Add New Premium dialog box is displayed.
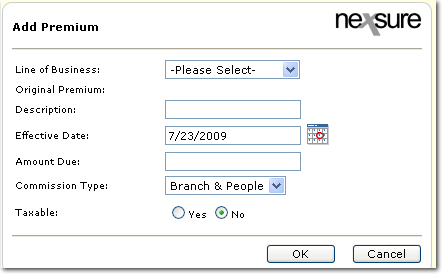
- In the Line of Business list, select the line of business to which to add the new premium.
- In the Description box, enter a description for the premium.
- In the Effective Date box, accept the default policy term effective date or enter a new date.
- In the Amount Due box, enter the amount due on the invoice.
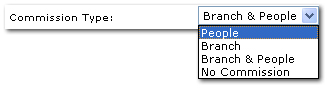
- In the Commission Type list, select the type of commission for the premium. The selections are:
- If adding a premium to an existing policy, the Copy Other Commissions option will be available. Select Yes to copy Other Commissions information to a new line for the additional premium.
- Select Yes or No to indicate whether the new premium is taxable.
- Click OK. The invoice tab is again displayed.
- In the Fees area, use the following guidelines:

- If changes to the Fees section are required, click the Details icon next to the fee to change. If a new fee is necessary, click [Add New Fee]. The Add Non Premium dialog box is displayed.

- In the Level / LOB list, select the line of business to which the fee will be applied.
- In the Fee Code list, select the name of the fee. The fee codes are the names of the fees that were created and associated to the policy branch during the invoice setup process.
- In the Service Provider list, select the entity that will provide the service. The Service Provider list includes names that were added during the invoice set up process.
- Click OK. The Add Non Premium Fee Details dialog box is displayed.
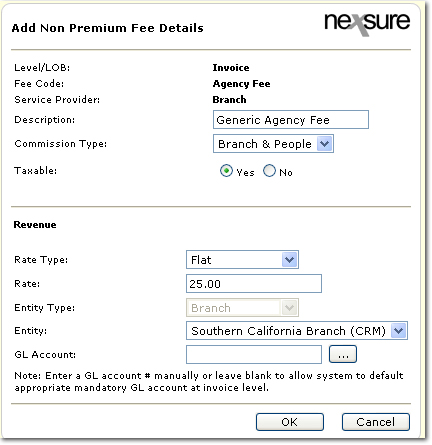
- The Description, Commission Type and Taxable entries are automatically added based on the selections made in the previous Add Non Premium dialog box. Selections can be altered at this point.
- In the Revenue area, selections are automatically made based on selections in the invoice setup process that are associated with the Commission Type and Taxable selections previously made. The selections that can be altered in the Revenue area are:
- Rate Type: Another selection can be made provided more selections were added during the invoice setup process.
- Rate: Enter a new rate if necessary.
- Entity: Select the receiving entity.
- GL Account: Select the receiving GL account number.
- Click OK. The invoice tab is again displayed.
- In the Taxes area, use the following guidelines:

- If changes to the Taxes section are required, click the Details icon next to the tax to change. If a new tax is necessary, click [Add New Tax]. (The Taxable option must be selected in the Add New Fee dialog box.) The Add Non Premium Tax dialog box is displayed.
Note: Both the premium and the fee may be taxable.
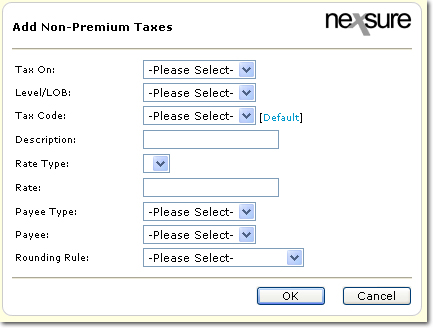
- In the Tax On list, the selection determines where the tax will be applied.
Note: If Fee is selected, the Fee Code list will also be displayed.
- In the Level / LOB list, the selection determines to what LOB the tax will be applied.
- In the Tax Code list, select the name of the tax.
- Optionally, once the Tax Code has been selected, click Default. The remainder of the selections will be automatically entered with the defaults created in the invoice setup process.
- In the Description box, enter a description for the tax. This entry defaults to the description entered during the invoice setup process.
- In the Rate Type list, make a selection to identify if the rate will be a flat dollar amount or a percentage of items taxable.
- In the Rate box, enter the flat dollar amount or the percentage of items taxable for the tax.
- In the Payee Type list, make a selection to identify which entity is paid for the tax.
- In the Payee list, make a selection if the Payee Type selected is Tax Authority.
- In the Rounding Rule list, make a selection to control the rounding on the tax when a percentage has been applied.
- Once all selections have been made in the Add Non Premium Tax dialog box, click OK. The invoice tab is again displayed.
- In the Agency Commissions area, use the following guidelines:

- If changes to the Agency Commissions are required, click the Details icon next to the commission to update.
- Click [Add New Agency Commission] to add a new commission. The Add Agency Commission dialog box is displayed.
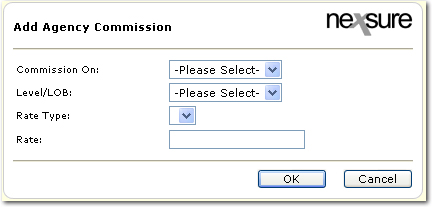
- In the Commission On list, select the item on which the commissions will be based.
- In the Level / LOB list, the selection determines to what LOB the commission will be applied.
- In the Rate Type list, make a selection to identify if the rate will be a flat dollar amount or a percentage.
- In the Rate box, enter the flat dollar amount or the percentage on which the commission will be based.
- Click OK. The invoice tab is again displayed.
- When the AR Entity is a Retail Agent, the Third Party Commissions will apply. In the Third Party Commissions area, use the following guidelines:

- If changes to the Third Party Commissions are required, click the Details icon next to the commission to update.
- Click [Add New Third Party Commission] to add a new commission. The Add Third Party Commission dialog box is displayed.
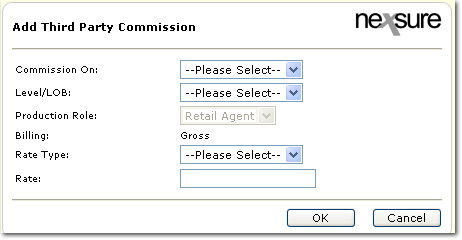
- In the Commission On list, select the item on which the commissions will be based.
- In the Level / LOB list, the selection determines to what LOB the commission will be applied.
- In the Rate Type list, make a selection to identify if the rate will be a flat dollar amount or a percentage.
- In the Rate box, enter the flat dollar amount or the percentage on which the commission will be based.
- Click OK. The invoice tab is again displayed.
- In the Other Commissions area, use the following guidelines:

- If changes to the Other Commissions are required, click the Details icon next to the commission to update.
- Click [Add New Other Commission] to add a new commission. The Add People Commission dialog box is displayed.
Note: If
default
commissions exist for Carrier, People or Fees, they will be created
automatically. Defaulted
commissions can be edited.
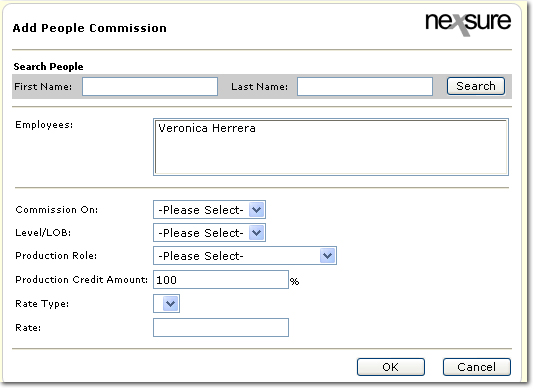
- In the Search People area, enter the first and / or last name of the employee.
- Click Search.
- In the Employees list, select the name of the employee with which to associate the commission. The default employee will be the employee that is assigned to the policy. Using the search function will return all policy branch employees.
- In the Commission On list, select the item on which the commissions will be based.
- In the Level / LOB list, the selection determines to what LOB the commission will be applied.
- In the Production Role list, select the role of the employee.
- In the Production Credit Amount box, enter the percentage of credit the employee will receive for bringing this piece of business to the agency.
Important: Upon saving the policy info, if the set up on the Invoice Defaults Tab requires the production credit to equal 100% upon putting policy info in force, if production credit is not equal to 100%, a dialog box will be displayed requiring that production credit line items are corrected to equal 100%. Any income bearing line item must have a related production credit line item total of 100%.
If the set up on the Invoice Defaults Tab allows production credit greater than 100%, while entering production credit line items, a warning will be displayed if production credit is greater than 100% but it will be allowed. Upon putting policy info in force, if production credit is less than 100%, a dialog box will be displayed requiring that production credit line items are corrected to equal or exceed 100%. Any income bearing line item must have a related production credit line item total equal to or greater than 100%.
- In the Rate Type list, make a selection to identify if the rate will be a flat dollar amount or a percentage.
- In the Rate box, enter the flat dollar amount or the percentage on which the commission will be based.
- Click OK. The invoice tab is again displayed.
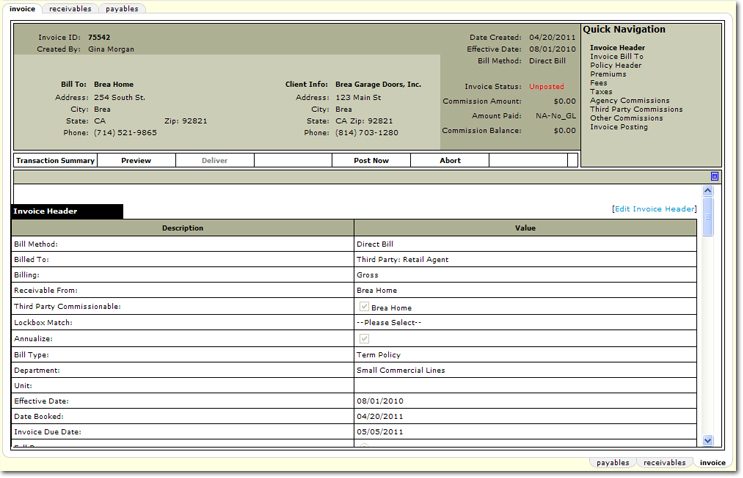
- Once all sections have been completed, the invoice can be posted. On the Navigation Toolbar, click Post Now. The invoice is posted.
Invoice Summary View
 icon to select the date.